Table of Contents
The system allows you to add schedules for sections, lectures, and subjects on the main platform through the system administrator account, following these steps:
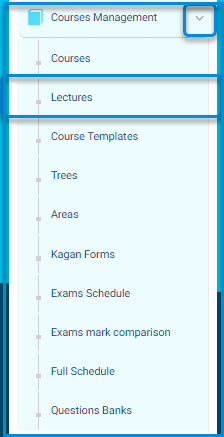
- Click on the courses management drop-down from the sidebar menu.
- Click the Lectures button to navigate to the screen for lectures and their content.
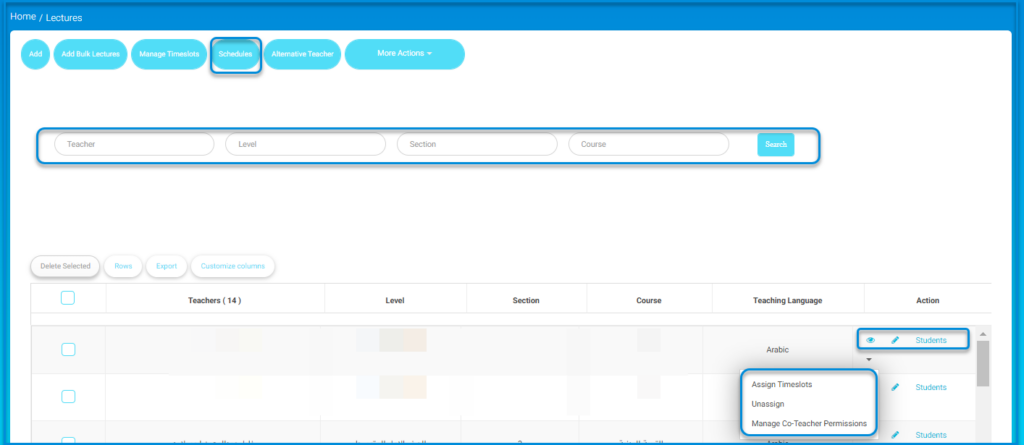
- The main lectures screen contains different tab labels:
- Add.
- Add Bulk lectures.
- Manage Timeslots.
- Schedules
- Alternative Teacher.
- More Actions.
It also contains search engines for teachers, level, course, and section.
Schedule #
- Click on the Schedule button.
- The system moves to a screen containing the Create schedule tab and a list of all schedules on the platform
- Click on the Create schedule button.
- The system moves to a screen containing the Manage timeslots tab.
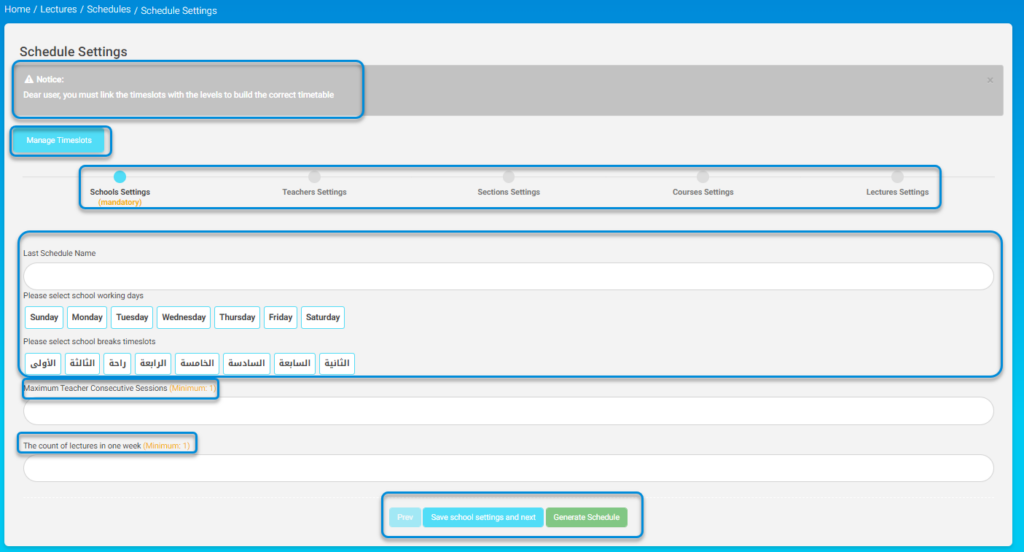
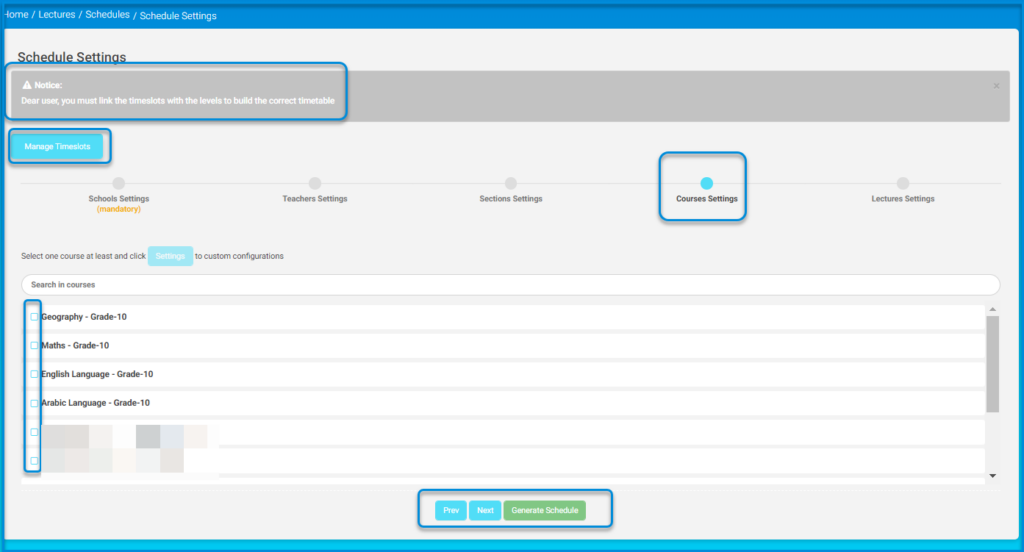
Note: The user must ensure linking timeslots with levels to build the correct timetable.

- New schedule creation settings:
School settings: #
- Enter a name for the schedule in the respective field.
- Select school working days by clicking on each day.
- Specify school break periods.
- Specify the maximum consecutive lectures for a teacher.
- Specify the session quota for each subject per week.
- Click on the ‘Save School Settings’ button and proceed to the next step.
Teachers’ settings: #
- Click on at least one teacher and click on the ‘Settings’ button to customize their settings.
- The system moves to the teacher settings screen.
- Enter the maximum daily lectures (minimum: 1) in the respective field.
- Enter the maximum consecutive daily lectures for the teacher.
- Specify the teacher’s free times.
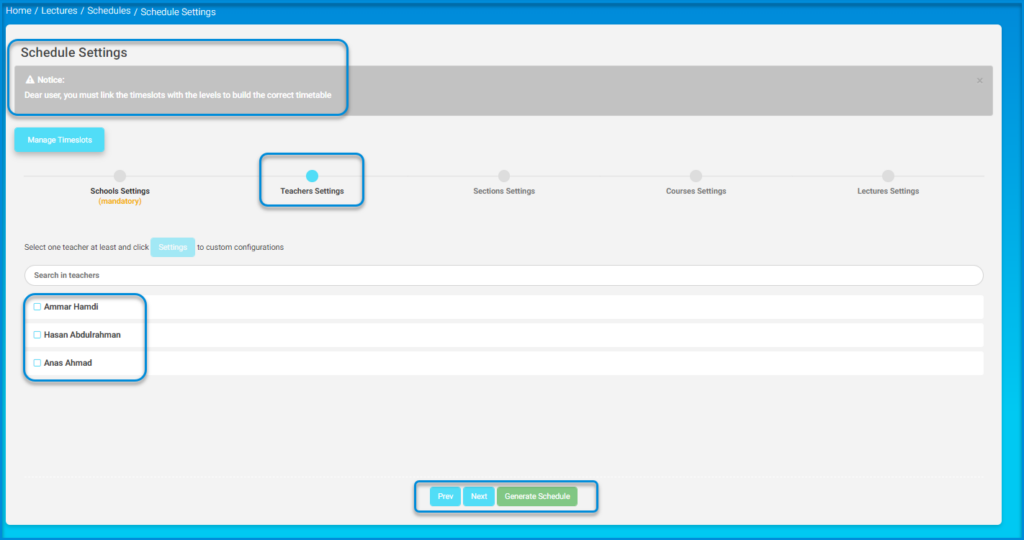
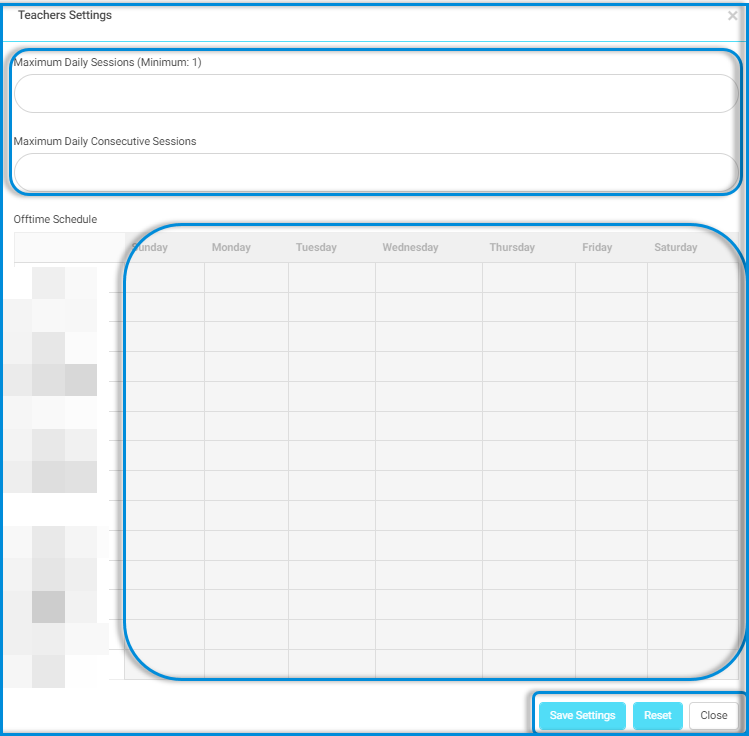
Note: When specifying free times, a comment can be added for that time.
- Click on the ‘Save Changes’ button to complete the settings.
- After completion, click on the ‘Next’ button to continue the settings.
Section settings: #
- Select at least one class and click on the ‘Settings’ button to customize the settings.
- Enter the maximum daily lectures (minimum: 1) in the respective field.
- Specify the teacher’s free times.
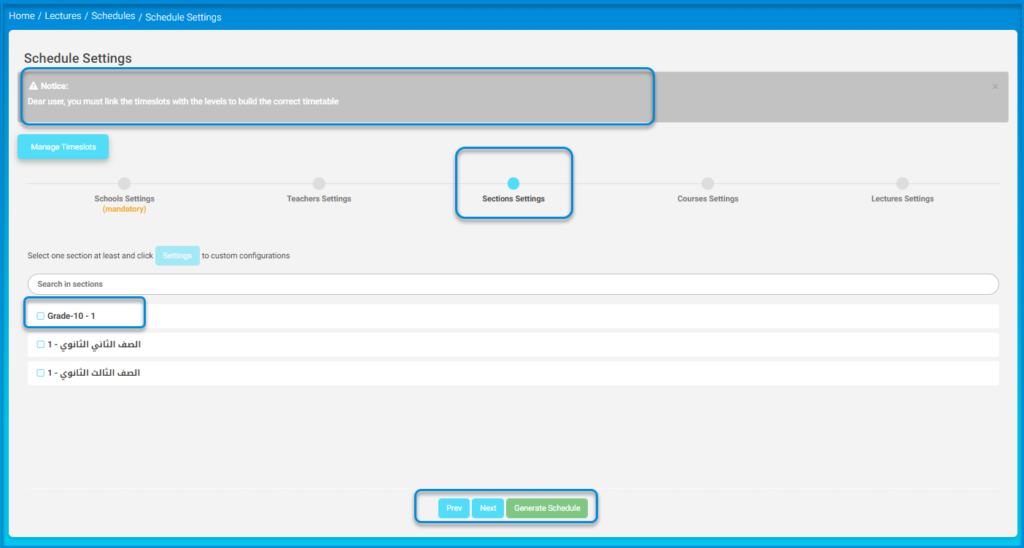
Note: When specifying free times, a comment can be added for that time.
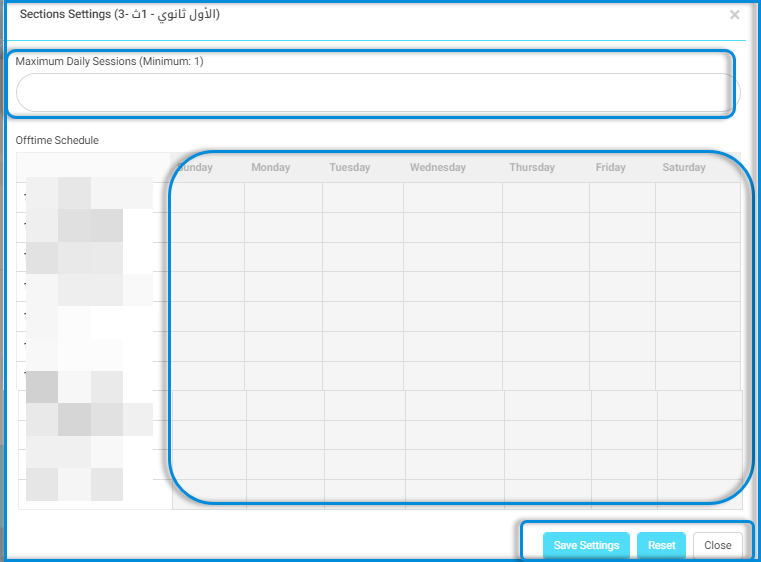
- Click on the ‘Save Changes’ button to complete the settings.
- After completion, click on the ‘Next’ button to continue the settings.
Courses settings: #
- Select at least one subject and click on the ‘Settings’ button to customize the settings.
- Specify the teacher’s free times.
Note: When specifying free times, a comment can be added for that time.
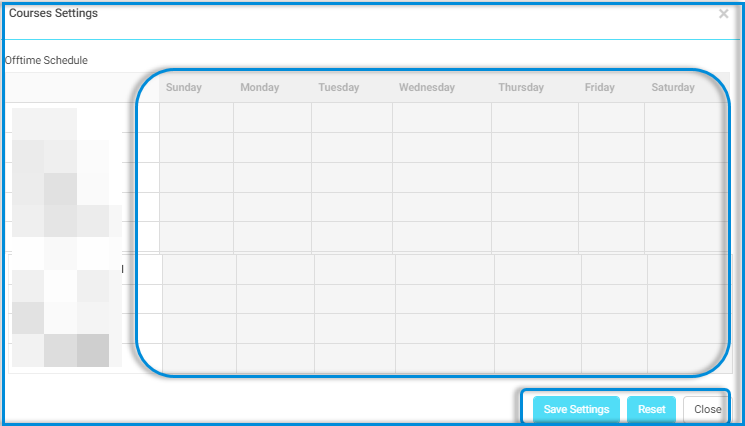
- Click on the ‘Save Changes’ button to complete the settings.
- After completion, click on the ‘Next’ button to continue the settings.
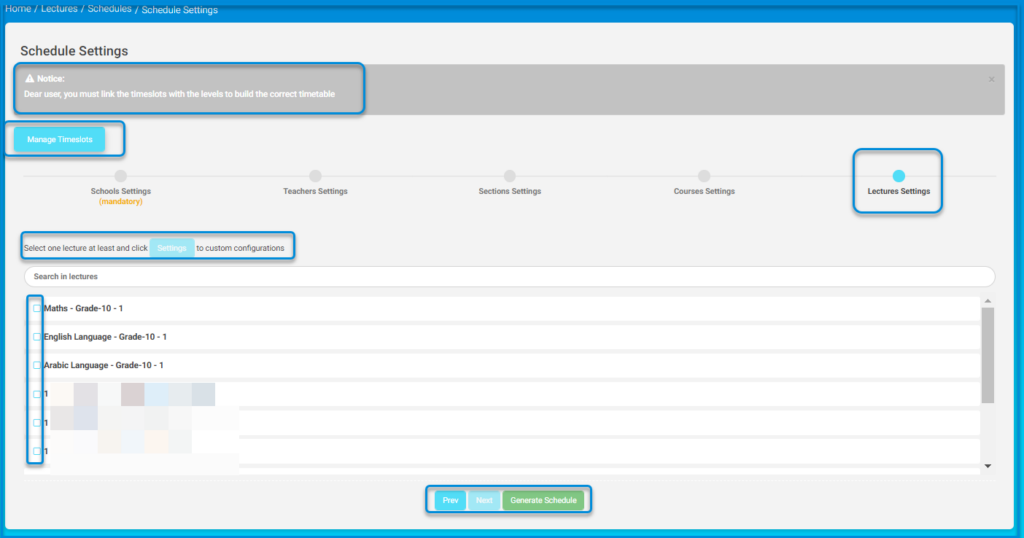
Lectures settings: #
- Select at least one lesson and click on the button.
- Click on the ‘Allow Notifications’ button to send notifications for any new changes.
- From the search engines, you can select the level, grade, section, and teacher’s name to display their table data.
- Click on the ‘Regenerate‘ button to reset the schedule.
