Teachers can add activities inside the classroom in the form of various questions, which can be answered in groups or individually according to the teacher’s choice. These activities are limited to in-class sessions and do not apply to virtual classes or remote attendance. Teachers can award students Classera badges that are added to their profiles.
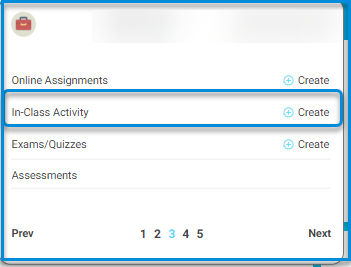
To access the in-class activity:
1. From your homepage, select the subject for which you want to add an in-class activity, then choose the third tab.
2. Select “In-Class Activity.

3. The activity page will appear, click the “Add Activity” button at the top of the page.
Enter the title and description (mandatory).
5. Check the box “Show In-Class Activity in Calendar” to display the activity in the calendar.
6. Click the “Submit” button.
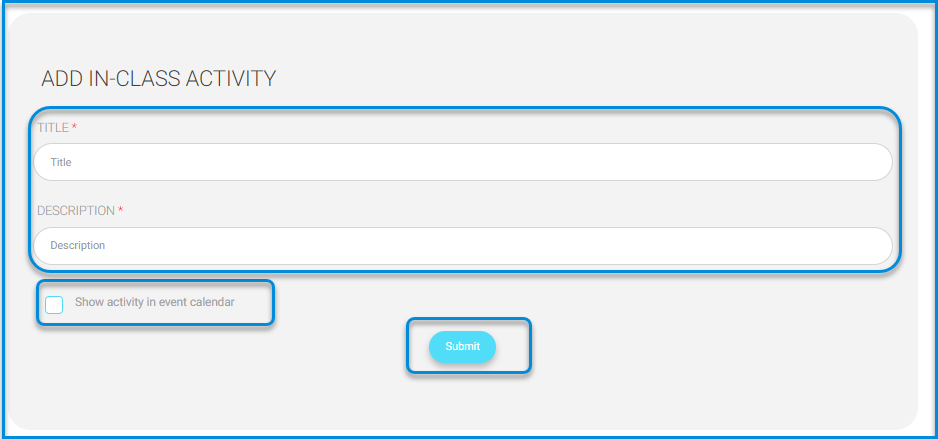
7. The new activity page will appear to add the required questions for the activity.
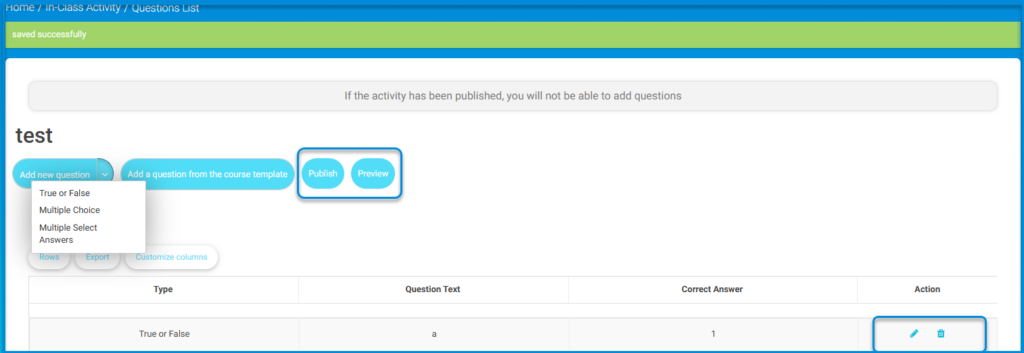
8. Click “Add New Question” and a dropdown list of question types will appear from the down arrow.
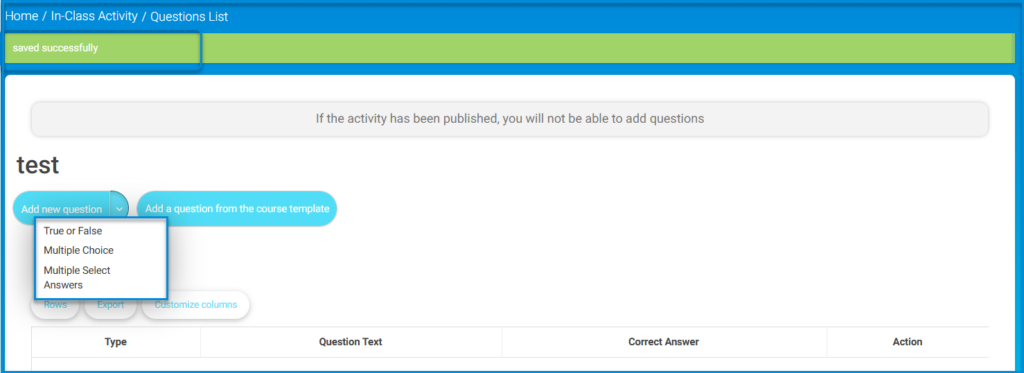
- True or False Question
- Multiple Choice Questions
- Multiple Answer Question
Note: If you publish the activity, you will not be able to add any questions, so ensure you add all the required questions before publishing.
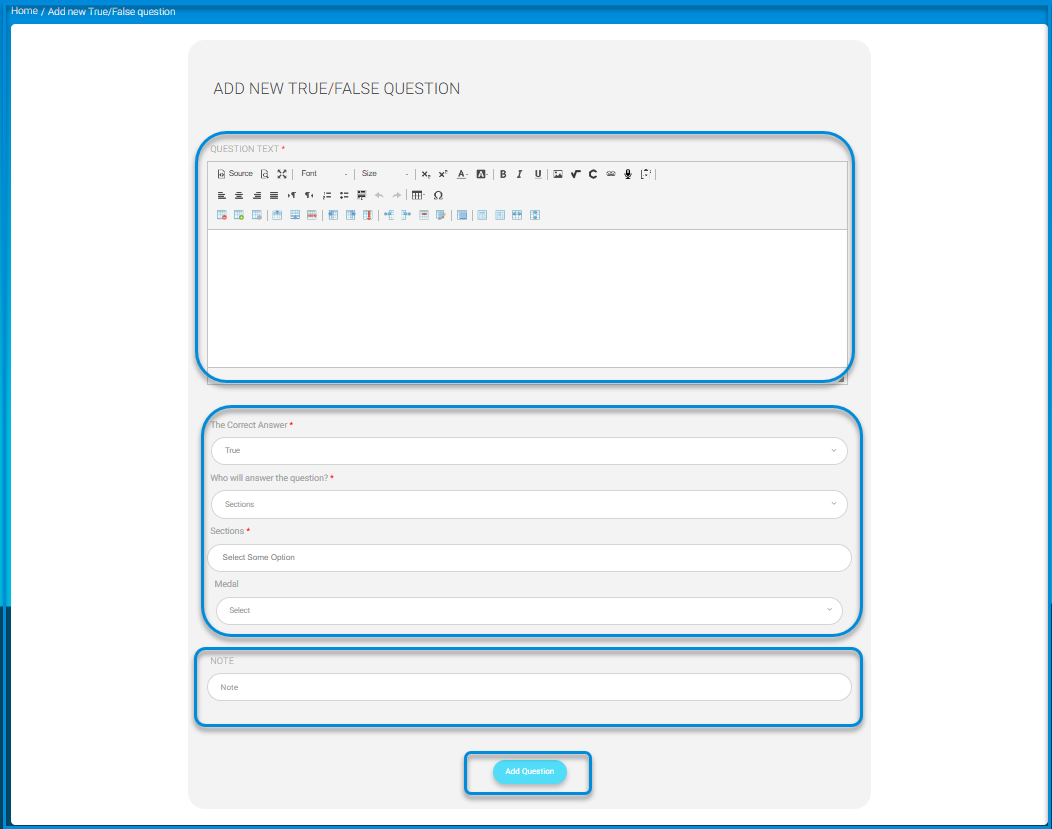
- 9. If you choose a “True or False Question,” enter the question text, then select whether the answer is true or false from the next field and follow the remaining steps.
- 10. If you choose “Multiple Choice Questions”:
- a. Enter the question text in the first text box, formatting it using the default text options available.
- b. Select the number of choices for the question from the dropdown list “Number of Options,” then enter the options one by one.
Select the correct answer for the question by choosing its number from the dropdown list “Correct Answer.”
Note: The correct answer will appear below the question after publishing, where you can adjust the screen dimensions to prevent the students from seeing the correct answer.
11. If you choose “Multiple Answer Question”:
a. Enter the question text in the first text box, formatting it using the default text options available.
b. Select the number of choices for the question from the dropdown list “Number of Options,” then enter the options one by one.
c. Then select the number of the correct answer.
12. Specify who will answer the question:
a. Sections: This option has two sub-options; “All” and “1.” The “All” option means that all students can participate in answering, and you can select them from the list after publishing. The “1” option allows only one student to answer the question.
b. Group of Students: If you have divided your classes into groups, select this option so each group can answer the question separately. When selecting this option, a dropdown list of the created groups for this class will appear in the next field; select the group and continue editing.
c. Choose the type of badge you will award to the student(s) for correctly answering the question, such as the “Excellence Badge,” which will be added to their profiles.
d. Add any required explanation with the question (optional) in the “Explanation” field.
e. Click the “Add Question” button.
13. You can now publish and then preview.


