Report card #
The system enables adding student and school report cards on the main platform through the system administrator’s account, following these steps: The Grade Management page allows you to generate grades reports, such as, Report Card and Criteria Based Report.
- Click on the Grades Management option from the sidebar menu.
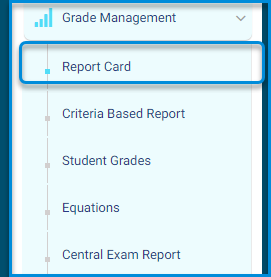
- Click on the Report Card button to navigate to the respective screen.
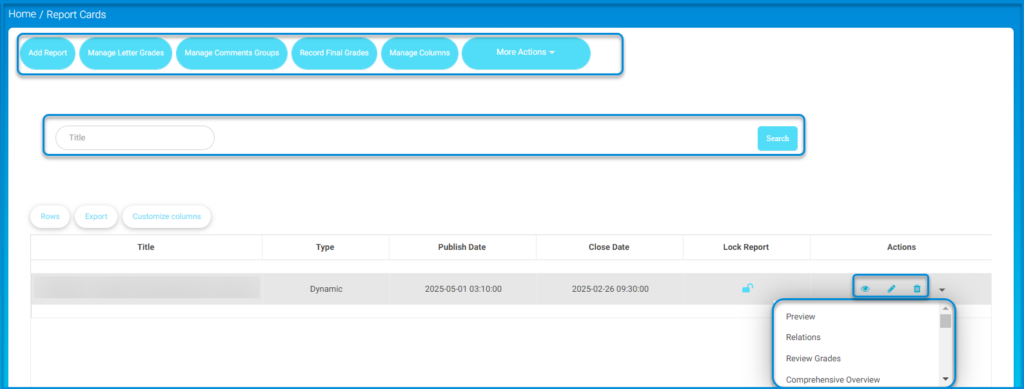
- the system navigates to the main screen of the report card, which contains various tabbed sections:
- Add Report.
- Manage letter grades.
- Manage comments groups.
- Record final grades.
- Manage columns.
- More Actions.
- Contains a table of all existing reports and their settings.
- The screen includes a search engine for report titles.

- Click on the Add Report button.
- The system navigates to a screen containing the types of reports available on the main platform:
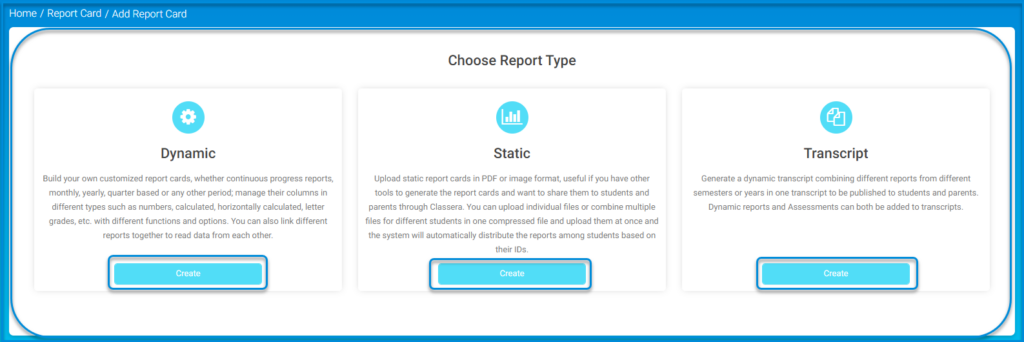
- Dynamic: Build your own customized report cards, whether continuous progress reports, monthly, yearly, quarter based or any other period; manage their columns in different types such as numbers, calculated, horizontally calculated, letter grades, etc. with different functions and options. You can also link different reports together to read data from each other.
- Static: Upload static report cards in PDF or image format, useful if you have other tools to generate the report cards and want to share them to students and parents through Classera . You can upload individual files or combine multiple files for different students in one compressed file and upload them at once and the system will automatically distribute the reports among students based on their IDs.
- Transcript: Generate a dynamic transcript combining different reports from different semesters or years in one transcript to be published to students and parents. Dynamic reports and Assessments can both be added to transcripts.
- Choose the appropriate type of report for the school and configure it:
Dynamic Report: #
- Click on the create button for the dynamic report from the main screen to add a report.
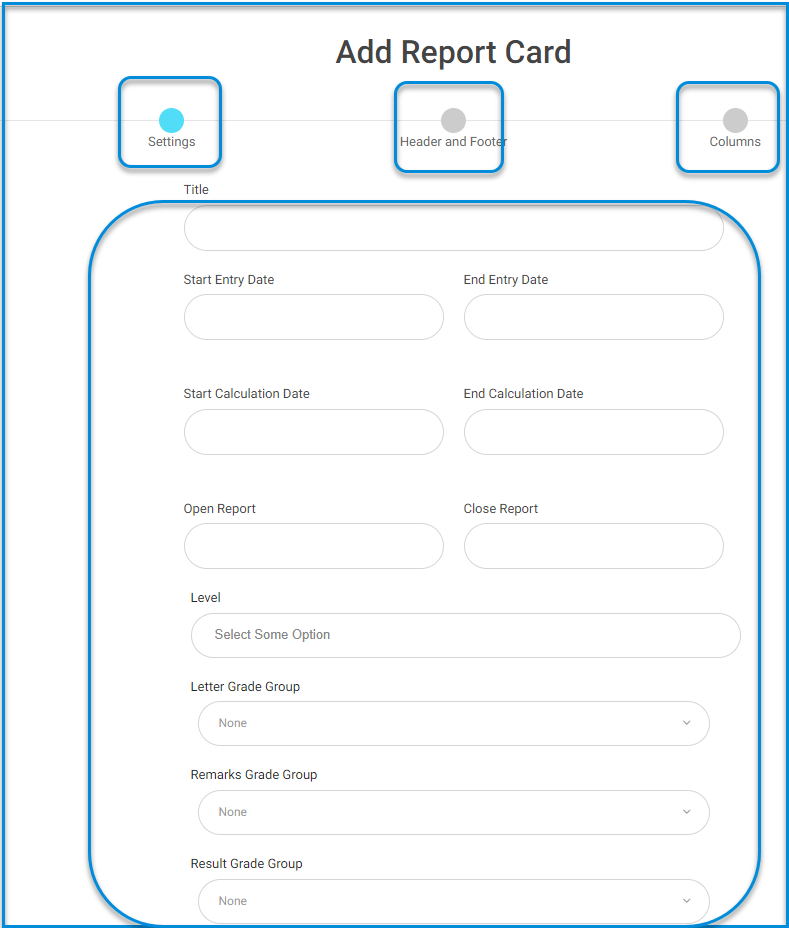
- The system navigates to review the main screen for adding a dynamic report and its following settings:
- Enter the title of the report in the designated field.
- Enter the start entry date and the end entry date for entering them in the respective fields.
- Specify the Start Calculation Date grades and the End Calculation Date for them.
- Specify the Open Report Date report to students and the Close Report Date.
- Select the levels associated with the report.
- Choose the display method for the selected report, as determined by the school.
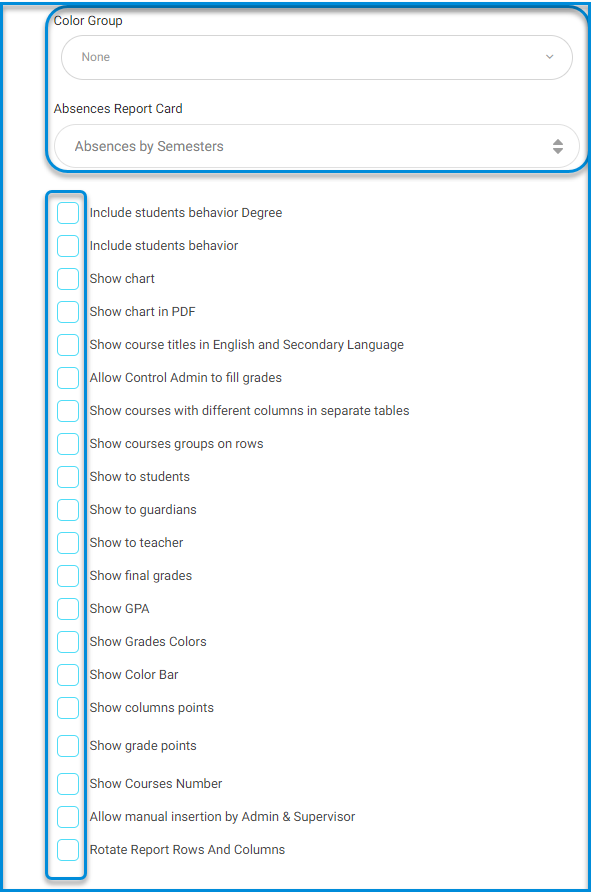
- Determine the type of absence and its impact on the student’s report from the dropdown menu for Absences Report Card.
- The school-specific settings include the following:
- Include students’ behavior Degree
- Include students’ behavior
- Show chart
- Show chart in PDF
- Show course titles in English and Secondary Language
- Allow Control Admin to fill grades
- Note: The system administrator is not allowed to control the filling of grades since it is the responsibility of the teachers to fill in the grades for the students and classes.
- Show courses with different columns in separate tables
- Show courses groups on rows
- Show to students
- Note: The report is not displayed to the student or parents/guardians until the grading process is completed.
- Show to guardians
- Show to teacher
- Note: The report is not displayed to the student or parents/guardians until the grading process is completed.
- Show final grades
- Show GPA
- Note: GPA display is selected in the case of a credit hour-based study system.
- Show Grades Colors
- Show Color Bar
- Show columns points
- Show grade points
- Show Courses Number
- Allow manual insertion by Admin & Supervisor
- Formative summative report
- Rotate Report Rows and Columns
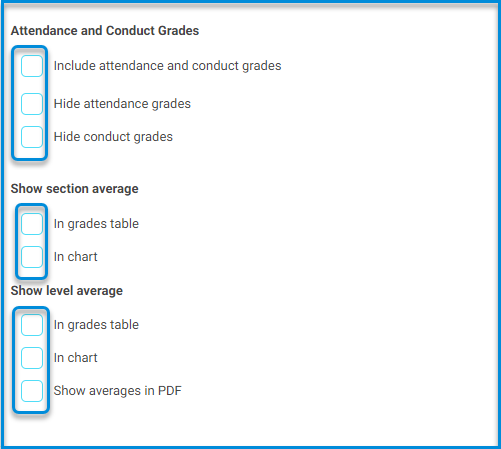
- Attendance and Conduct Grades
- Include attendance and conduct grades
- Hide attendance grades
- Hide conduct grades
- Show section average
- In grades table
- In chart
- Show level average
- In grades table
- In chart
- Show averages in PDF
Note: The report settings are determined according to the school’s needs and requirements.
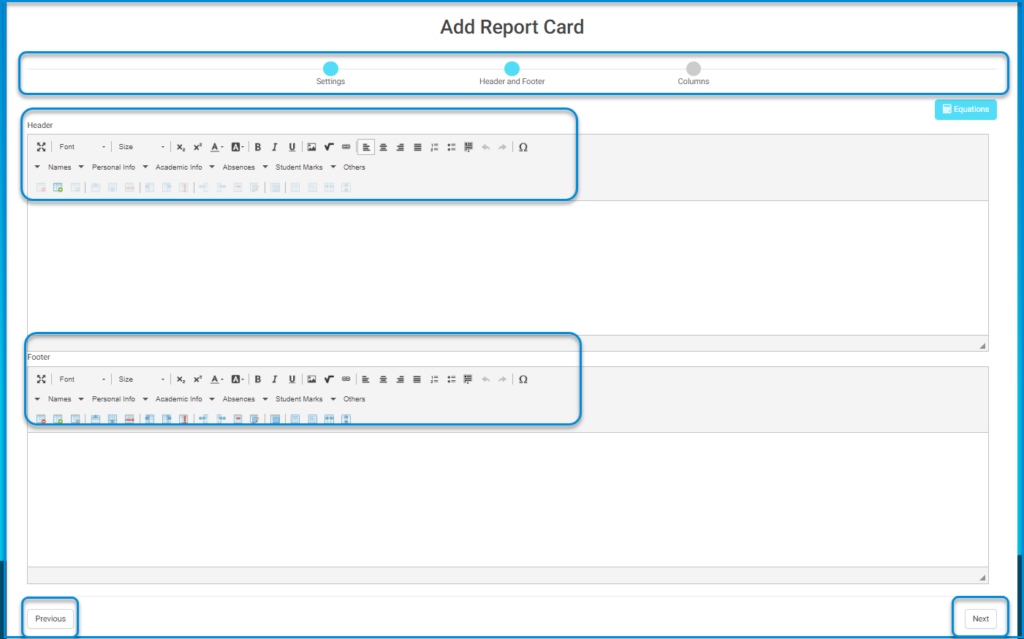
3) Click on the “Next” button at the bottom left of the screen.
- Second Header and Footer: This page is responsible for designing the report.
- Design the header of the page by writing the title of the report.
- Insert the school’s logo from the dedicated tab for inserting images.
- Insert specific data provided by the school administration to appear in the report header, such as the student’s name from the taskbar listed in the header.
Note: School-specific data can be controlled for insertion into the report header from the taskbars within the header of the page, and adding or removing each can be controlled by clicking on their respective menus.
- We move on to designing the footer of the page, which includes signatures and data specified by the school.
- Click on the “Next” button to continue with the settings.
- Third Columns:
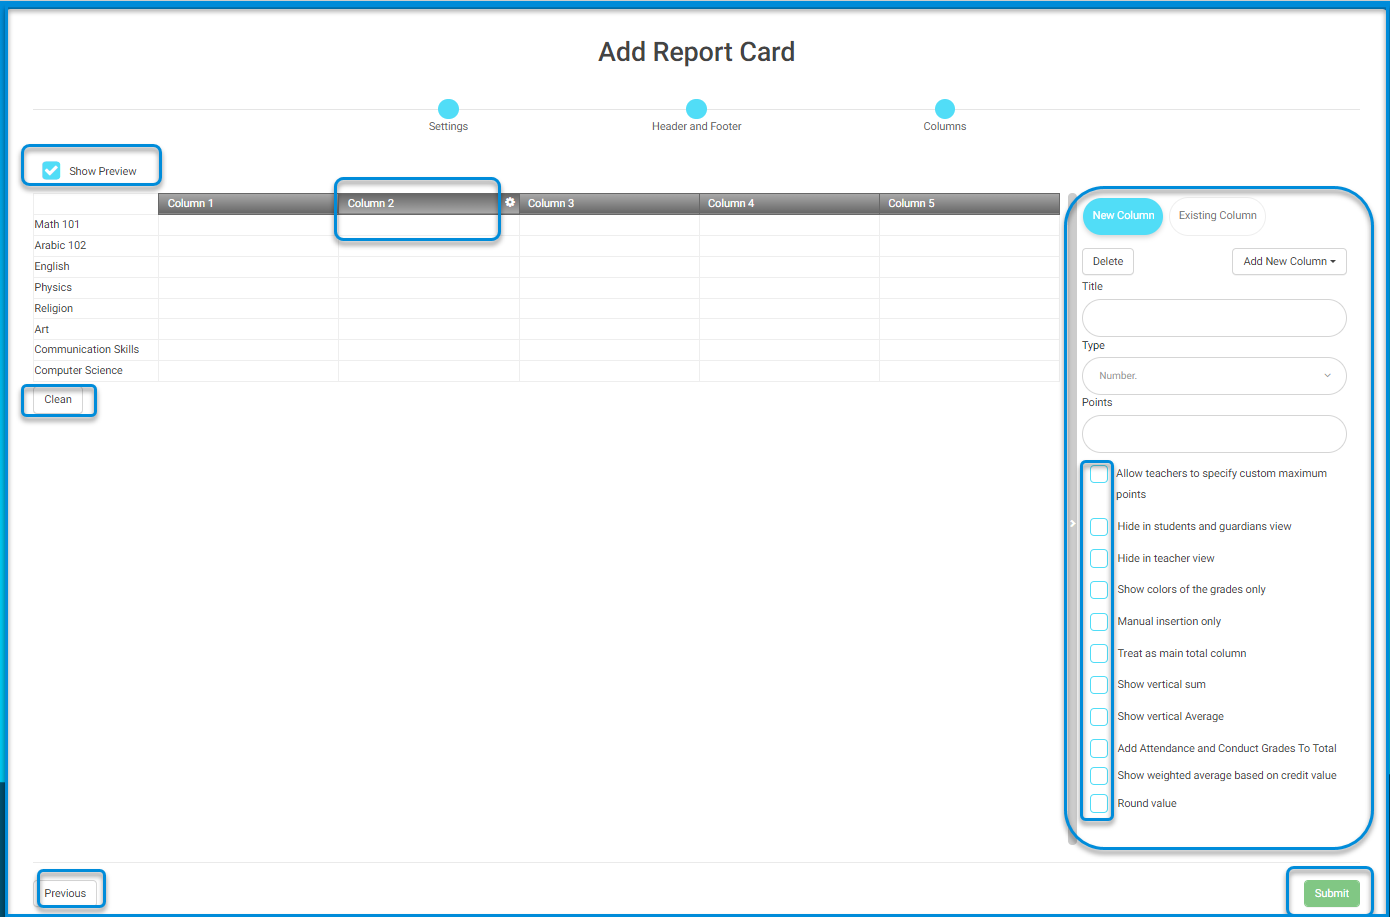
- The system navigates to the screen for column settings within the system.
- Click on the column to adjust the settings specified by the school.
- Columns can be added to or removed from the sidebar menu of the column table.
- Add a title specific to the column.
- Specify the type of the column.
- All settings are determined by the school administration and are prepared accordingly.
Note: Column settings are based on the column’s usage and the desired format according to the school administration’s instructions and specifications.
- After finishing, click on the “Submit” button to complete the dynamic report creation process
- A message appears indicating that the grade report has been sent to the cache and the grade report has been saved.
- The system moves to the main screen for dynamic reports.
- From the reports table, you can select and review the report.
- Click on the dropdown menu for the report from within the reports table.
- Click on the “Preview” button.


