Table of Contents
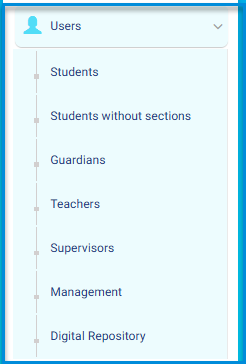
There are six main user categories with different roles and permissions. The school administrator has the utmost management over these users. He can add and delete users in addition to logging in as such users. From the main menu, click the Users drop-down button, then select the required category.
Users Categories: #
- Students
- Students Without Sections
- Guardians
- Teachers
- Supervisors
- Management
- invalid numbers requests
Students Page Contents : #
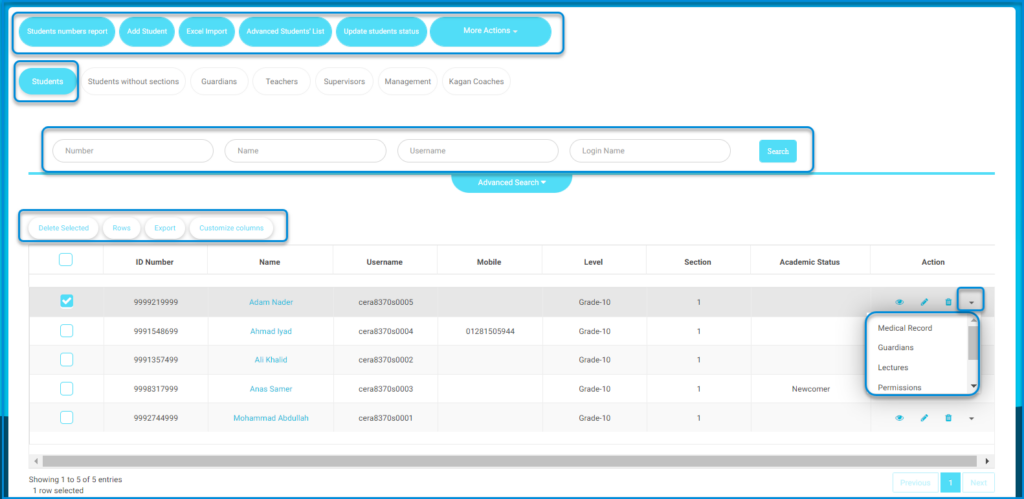
- The Students Numbers Report button to show students’ numbers in each stage, level, and section.
- The Add Student button to add students individually.
- The Excel Import button to add bulk students from an Excel file.
- The Advanced Students’ List button to show the detailed students’ information, through which it is possible to verify the missing information that needs to be added.
- The Update Students Status button to import students’ data and update their status.
- The More Actions drop-down button which includes more actions to take upon students, such as: (Show Students and Guardians Relation – Add and Update Guardians Accounts – Reset Passwords -…)
- The screen contains a search engine with various methods to search for a student within the educational platform, done by entering the student Number, Name, Username, or the student’s Login Name.
- The main students’ page contains a table with all the registered students on the platform and their data.
- The Action column in the table enables you to view, edit and delete the students details alongside with a drop-down button where you can view the medical records of the students, manage the students’ guardians, view the students’ lectures and manage them.
To Generate a Students Numbers Report: #
- Click the Students Numbers Report button.
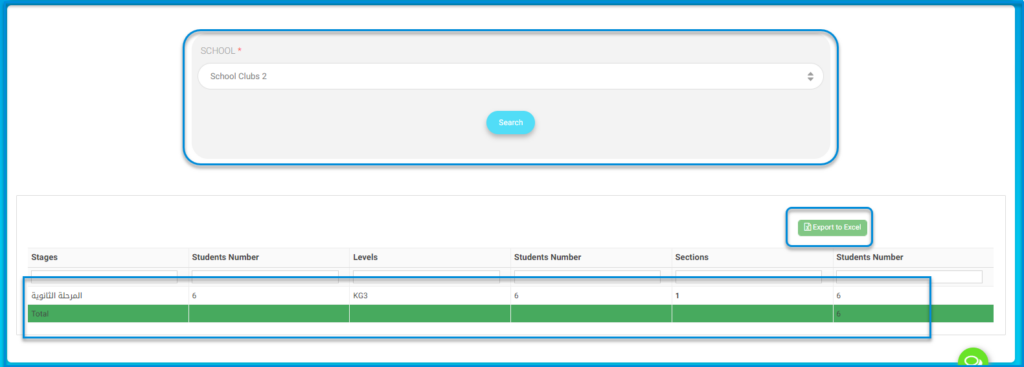
- Choose the school for which you want to extract the students’ report from the drop-down list.
- Click the Search button.
- A comprehensive report appears containing the school’s students’ data, including the educational stages, the number of students per stage, the levels within the stage, as well as the number of students in each class.
- Click the Export to Excel button to export this report to an Excel file.
To Browse Advanced Students’ List Page: #
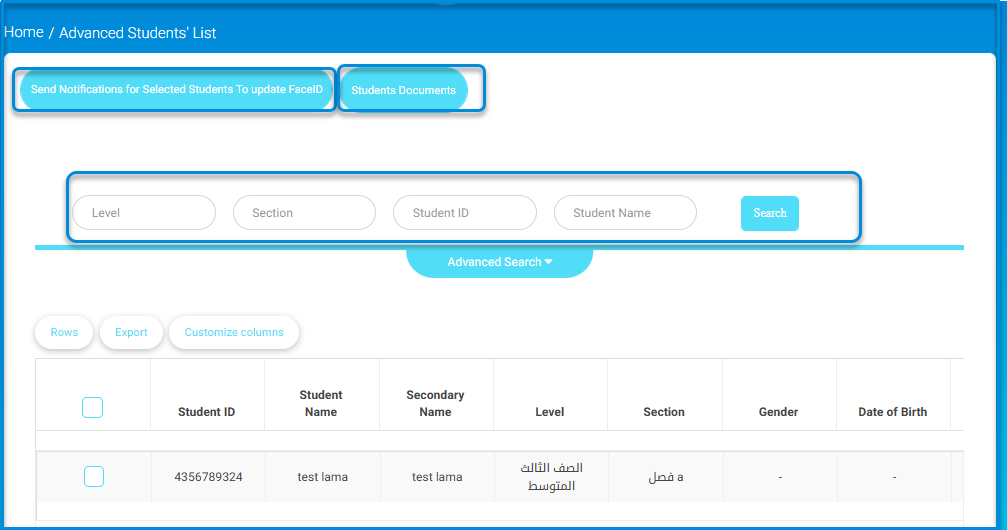
- Click the Advanced Students’ List button.
- A table of students’ data appears.
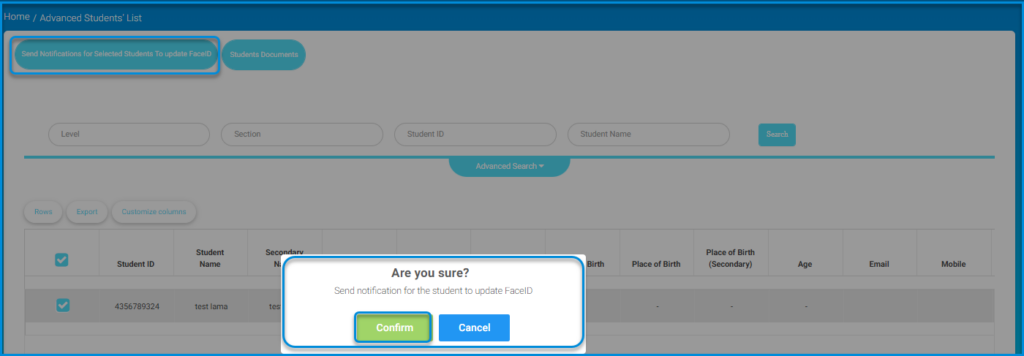
- Select the students required to update their face ID, and click the send notifications button for selected students to update the face ID recognition feature if they have not already done so, then click the confirm button to complete the process.
- Click the students’ documents button to start uploading their documents.
